If you are using Infusionsoft to build your email list…having the ability to track contacts based on when they signed up and under which tag they were added, can be a great asset to your business.
In this post, I show you step by step how to set up tagging by date and how to use this information to automate your marketing.
Here’s 4 ways that you can use these tags:
#1: Segment contact and move into a particular campaign
#2: Send them a specific broadcast based upon their indicated interest in your content
#3: Measure and see how effective a particular campaign is
#4: Use them to monitor your ongoing campaigns to see if they continue to be effective and determine if they may need improvements.
Step by Step Instructions To Help You Set up Infusionsoft Tagging By Date:
Here is a simple report to run so you can see what activity has happened under specific tags within a specific time frame.
Step #1: To start, go to your main menu and click on reports at the bottom of the Marketing column:
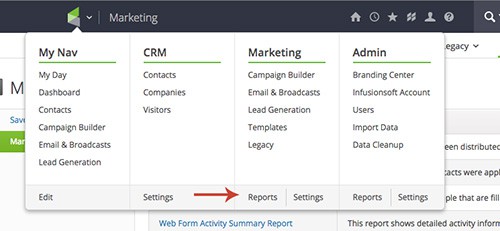
Step #2: Click on the blue “Tag Applications”:

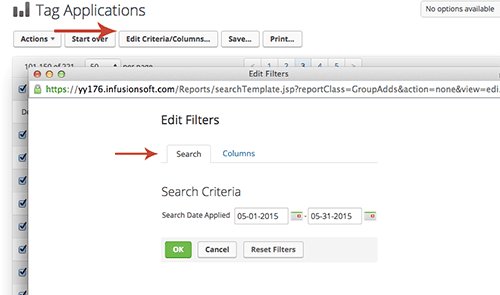
Step #3: It will give you a place to put in the dates you want to run the report for. Insert the dates and click search. Then it will take you to the following page. From here, click on Edit Criteria/Columns:
Step #4: It will give you another search criteria box and you can change the dates if you need to:
Step #5: Or you can click on Columns and this box will come up:
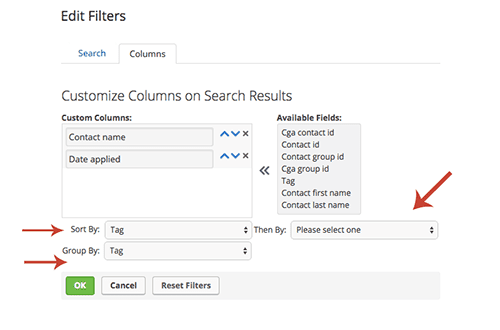
Step #6: Use the sort by, group by, then by as needed options to refine your search.
As you can see from below, it will give you the tag name at the top with the contacts below and the dates they were applied.
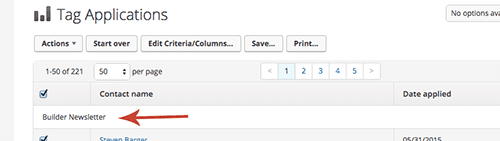
And that’s all there is to it. An easy report to keep track of when and who applied specific tags.