Are you considering adding video to your website or content marketing efforts?
You should consider it. According to statistics, the video content is the number 2 most read/watched piece of content.
If you’ve heard that video marketing is the future, the future is here. This is the right time to put your efforts into creating a video.
Wondering if you have enough resources to create videos?
Wondering if enough people in your target audience interested in videos?
And are you wondering if in the end, will it be worth the effort?
The answer is yes, yes yes!
If that isn’t enough to convince you, here are some video marketing statistics that will inspire you:
- 85% of people online watch video – Statista 2018
- 54% of people say they want a video from brands and businesses they are interested in – Hubspot 2018
- 87% of marketing professionals use video to market themselves – Wyzowl 2019
- 88% of marketers who use video are satisfied with the ROI – Animoto 2018
- Video marketing increases lead generation by 66% – Opt-In Monster 2018
Here’s a shortlist of video content that you can create to market your business.
- Explaining your products or services
- Vlogs (video blogs)
- Case Studies
- Tutorials
- Product Reviews and demos
- product demos,
- Facebook Lives & stories
- Instagram stories
- Testimonials
- Online Ads
I don’t know about you but I’ve struggled to get my system down so it is easy to make those videos.
Here’s how easy it is to set up your home video studio like a pro!
And I’ve added extra resources to this post including a workbook showing you how to set up your home video.
Links to a couple of posts to help you quickly create those video posts once you’ve got your home video studio set up and running…
- The Video Post: Your Guide to the #2 Most Popular Post
- Traffic Tip: 4 Ways To Add Video Into Your Content Marketing
- Traffic Tip: How to Embed Your Facebook Live Videos on Your Blog
I wrestled with setting up my home video studio myself and thought there has to be a better way! So I turned to Youtube and got this simple 6 step process from one of the best in the business…James Wedmore.
Once I used his simple step-by-step process I was able to set up my studio and get rid of the shadows that had been plaguing me…
And…
To make it even easier for you I’ve put the entire process into a simple step-by-step tutorial that you can print out, add to your studio kit, and have handy every time you set up your studio…
Step 1: Essential Equipment
You can outfit your entire home video studio with the basics for less than $200 on Amazon.
Here’s a list to get you started:
- Cowboy Studio Lighting Kit ($73 on Amazon)
- Cowboy Studio Overhead Light ( $80 on Amazon optional)
- Cowboy Studio Backdrop ($51.24 on Amazon)
- 60″ Camera Tripod ($23.49 Amazon Basics
- Audio Technica Lavalier ($29 on Amazon)
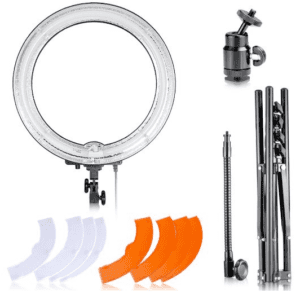
- New Light Ring ( $169 optional)
2. Setting Up Your Backdrop
When setting up your backdrop you want to position it 3 feet behind where you plan to stand when shooting your video. You want to appear like the polished expert that everyone wants to work with…
Take time to iron your backdrop fabric carefully and carefully inspect it when setting up.
Wrinkles and stains on your backdrop are a distraction.
Step 3: Setting Up Your Camera
Once you have your backdrop set up, mark 3 feet in front of it with some blue tape, or to make it even easier find a volunteer to help you with this part of the setup, it will go much faster if you are manning the lights and camera while your subject is standing where you want to film.
Place the camera 3 feet in front of your subject.
Adjust your camera height so you’re filming the subject at eye level. You’ll want to appear in the middle to upper 1/3rd of your camera/iPhone when it is horizontal.
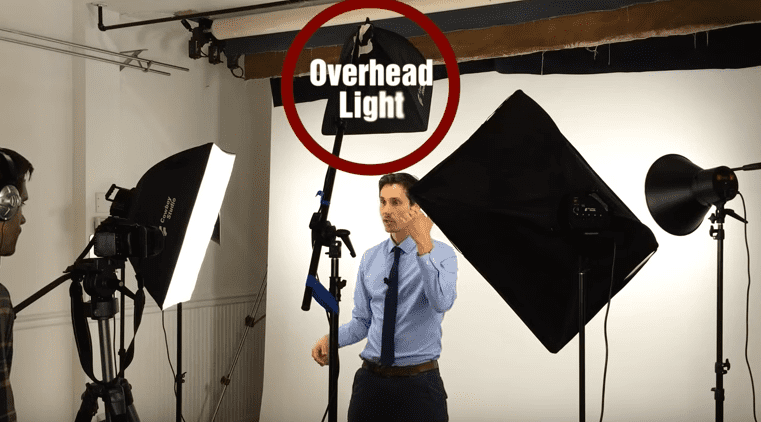
Look at the example image above of how James is positioned… see where he is standing?
It’s what you want to achieve because you’ll have room around to position captions or copy when creating a custom thumbnail for your video when editing.
Step 4: Lighting Your Background
This is where it got tricky for me and I know this step is going to help you out…
Get your lights as close as possible to your background.
Position them at a 45-degree angle aiming them at your background – you want it to look super white with no shadows.
One on each side of your subject.
The next step is to light your subject and you may want to come back and play around with these background lights once again to make sure there aren’t any shadows on your backdrop…
Step 5: Lighting Your Subject
Lighting your subject is pretty much the same as lighting your backdrop.
You need two lights positioned at 45-degree angles on either side of your subject.
The first light you position is the primary light, just choose one side and light up that side of your face.
The second light is on the other side of your face also at a 45-degree angle and with this one, you will position it to fill in all of the shadows on the face of your subject.
Shadows on your face, on your backdrop, and overall dark lighting, are things that you want to avoid on your video
Take time moving this light around until you get it looking white and crystal clear on your video.
Now it’s time to make a test video.
Do this each time to make sure your lighting is set up and your audio is working perfectly.
I’ve saved myself a lot of time, tears, and headaches by running a test each time I shot one of my videos.
Watch the entire home video studio tutorial here
https://www.youtube.com/watch?v=wYhT_ua3s7M&t=4s
The Right Lighting is Critical
If you do anything, make sure your lighting is good! If you don’t have professional equipment or in a hurry, you can use natural lighting,
Here are a few more tips with examples to help you get your lighting just right
- The third light – use this up high like the screenshot below. Place it high over your head to highlight and add extra depth to your video shoot.
- Light Ring – This is used to add more light to your face plus you can put the colored ring on it to change the tone of your skin. Totally optional but if you’re serious about looking amazing on camera without having to do a bunch of additional editing this is a great tool to have.
Audio and Editing Tips
I would be remiss if I did not include a few more tips about audio and how to make editing simple!
- Audio – Getting this right is just as important as your lighting. When you invest in a lavalier or a microphone, you will instantly upgrade the quality of your video. I’ve listened to podcasts and videos where the audio was terrible and I clicked off because of that. So do consider investing in some audio equipment, it will pay off in the end!
- Editing – I would be remiss if I did not mention Screenflow – I use this tool to edit all of my videos…I used to struggle and hate the editing of my videos. So much so that I would shoot them and put them up unedited…not my best move. Now I can drag in music screenshots, bumpers and have fun editing my videos!
Back over to you…Let me know if you found this helpful!