In this post I’m showing you how to create a custom 404 page because no page on your blog should be a dead end.
We’re going to turn your 404 page into an asset.
I’m betting your 404 page currently looks kinda like this…right?
 Right now that 404 page isn’t doing you any favors other than acting as a dead end…most visitors will immediately leave and those numbers just add as another bounce to your metrics.
Let’s change that by creating a custom 404 page that gets them headed back in the right direction:

How to create a custom 404 page for your blog
Here’s 3 elements you need to have when you create a custom 404 page for your blog:
- A search bar
- A Contact Button
- Menu at the top
Bonus tip: Add a list of blog posts to your custom 404 pages.
Step 1: Download a 404 Plugin for your WordPress Site
I highly recommend this one here: https://wordpress.org/plugins/404page/. Here’s a list of what I look for in a plugins when considering to download.
- It’s got high ratings – 4 1/2 stars
- Lot’s of downloads 30k+
- Recently updated – a month ago
Be sure to back up your site before adding any new plugins just in case it doesn’t play nicely with your site. And do make sure you have the most recent version of WordPress and that all of your plugins are up to date before adding anything new to your site.

Step 2: Install & Activate your Plugin
- Log into your WordPress Site
- Click on Plugins, Add New
- Then click the upload button and locate it on your desktop, then upload it.
- Install and activate your plugin
Step 3: Create Your Custom 404 Page
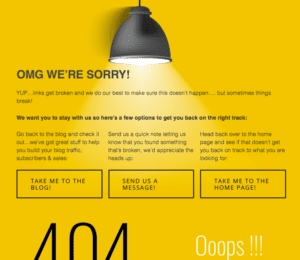
Start by Creating a new page on your WordPress site which will be your new custom 404 page. Here’s a peek at what my custom 404 page looks like:
 I chose a background image for my new page over on Big Stock Photos
- Click on pages then add new
- Add your background image
- Add copy and links to help your visitor find their way back to other pages on your blog.
- Save your work
- Test your page before taking it live as your new 404 page to make sure your links work!
When you are done it is time to set up your 404 page using the plugin:
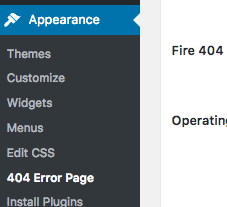
- Click on Appearance
- Then on 404 Error Page

- Then all you need to do is to select your new 404 page you created from the drop down list
- click save and you’re done!
- Well, not quite, I am a stickler for testing so go test out your new custom 404 page to make sure it works.

Here’s some inspiration to help you create a custom 404 page for your blog
You can find this template over at: https://themeforest.net/item/creative-404-pages-part-2-/11449718You can find this template over at: https://themeforest.net/item/creative-404-pages-part-2-/11449718You can find this creative 404 page at: iStock PhotoThis fun 404 page using Justin Bieber comes from the folks over at Spotify.You can get this custom template over here: https://themeforest.net/item/creative-404-pages-part-2-/11449718You can get this custom template over here: https://themeforest.net/item/creative-404-pages-part-2-/11449718

Watch & Learn How to Create a Custom 404 Page:
This simple video tutorial walks you through the step by step instructions to creating your first 404 page using the plugin and how you can customize it.


