If you’re an Infusionsoft application owner you may be wondering how to improve your marketing to your leads.
You may already know that building email list so that you can market and sell to your prospects is one of your most important marketing activities.
It is the easiest way for you to build a relationship with and keep in touch with prospects who have interest in your digital products and/or services.
However, knowing exactly what to do with your new leads after they’ve joined your email list is critical to building that initial relationship so that you can convert them into paying customers.
Imagine having 1000 brand new prospects from multiple sources and they are all jumbled together in your campaign software….yikes!
Imagine having no idea what brought them to your site or what their interests are, you just know you have those 1000 names.
Or…imagine having those same 1000 prospects who are organized and tagged appropriately so you can market to them so that they are moved from prospect to happy customer.
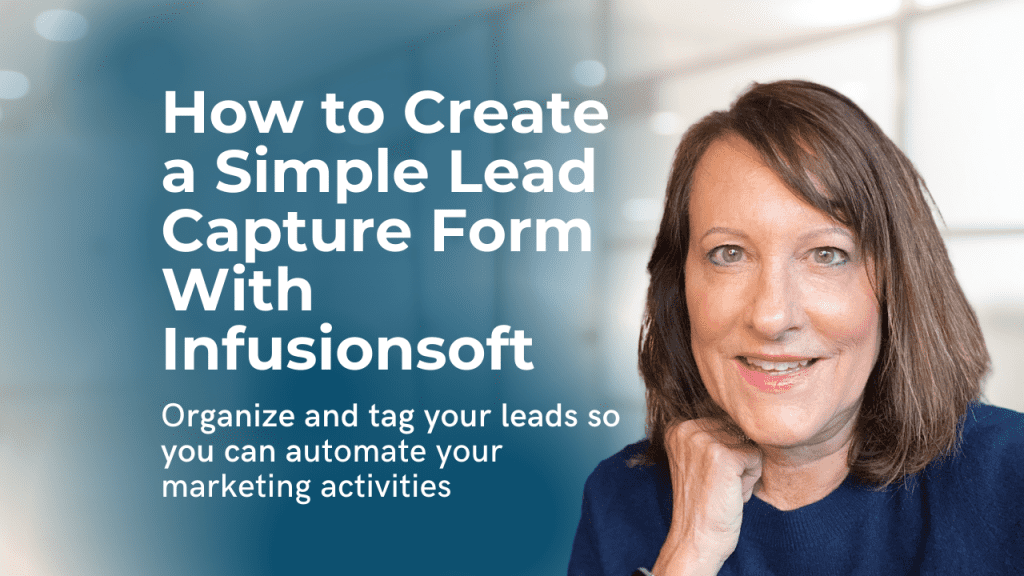
I’ve created following tutorial where I’m going to walk you through the steps of setting up a simple lead capture form in your Infusionsoft application.
For today’s example, we are going to pretend that you have an ebook you are giving free in exchange for your prospect’s information.
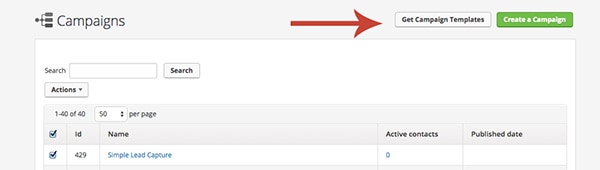
Step One: Log into your Infusionsoft application and head on over to the campaign builder.

This will bring you inside the Campaign builder where you will see a list of all your campaigns that have been built and deployed.
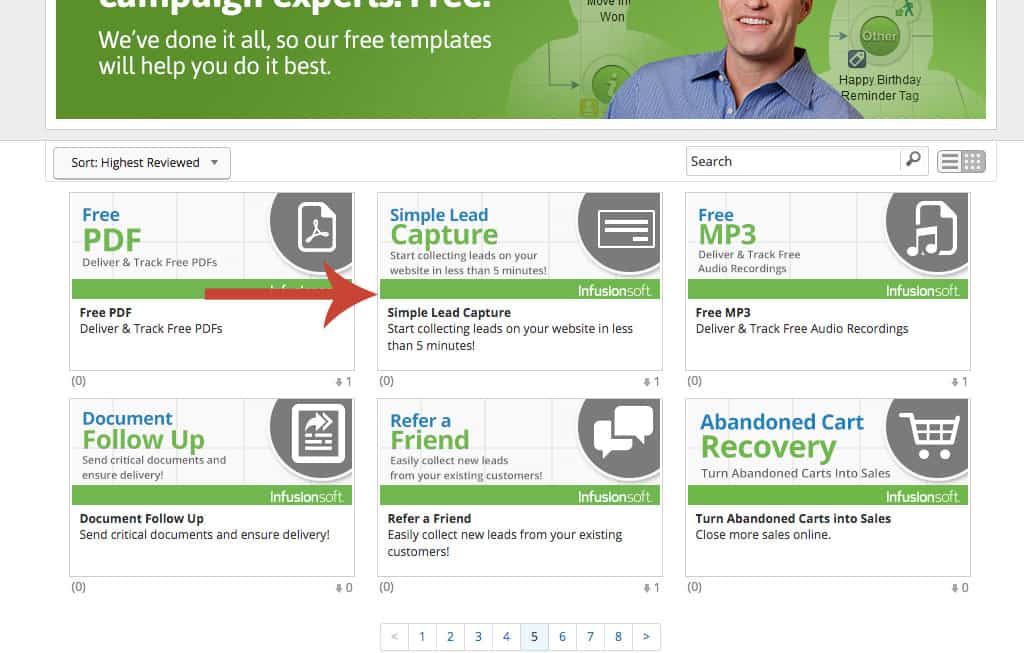
Step #2: You will click in the top left-hand corner on the white box that says Get Campaign Templates.
Step #3: You will be directed to a screen full of lots of templates. Scroll through a few pages until you see the “Simple Lead Capture” box.
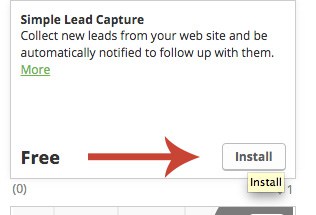
When you click on the box, it will show this menu and you simply click Install:
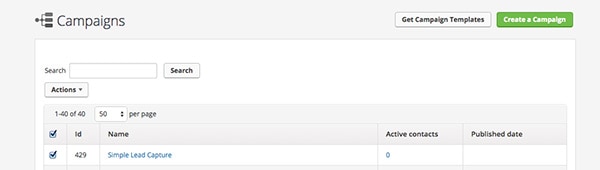
Step #4: Once the campaign template is installed, it will return you to the list screen and you’ll see the campaign created and you can double click on it to open it to the next section.
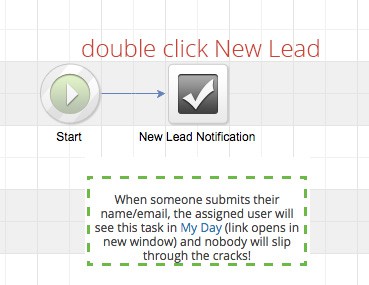
It will open up to this screen with the basic format in place. Double click on the New Lead Sequence.
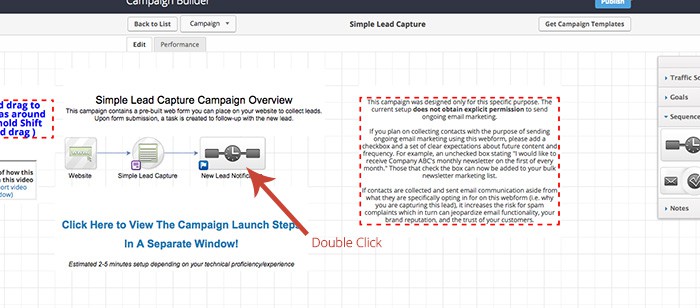
After double-clicking, it will open up to the following screen and you’ll want to double click on the New Lead checkmark button:
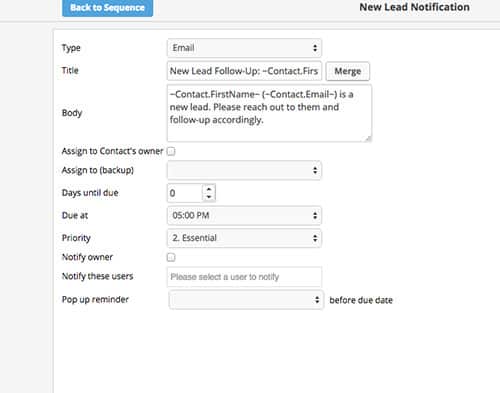
Step #5: This will open up the correspondence where you are going to create for your new leads to see once they have entered and confirmed their information.
This email will automatically go out. You can put the link to your free ebook here or the link to the page where they will download it from.
Fill it out with whatever information you want.
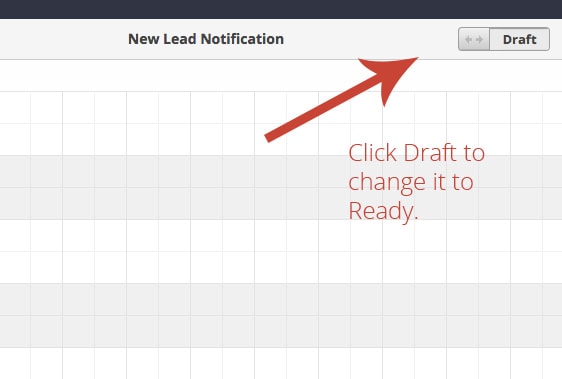
Step #6: Once you have the email set up the way you want it, look up in the top left-hand corner where it says Draft.
Click this to change it to Ready and it will also turn it green.
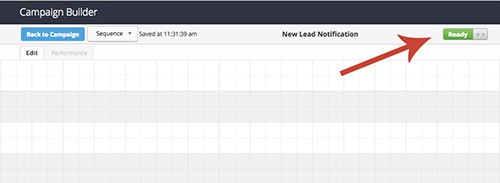
On the opposite side, after you change the draft to ready, click on the blue Back to Sequence button on the right-hand side:

Once back to Sequence, you’ll also change the draft to ready and then click Back to Campaign.
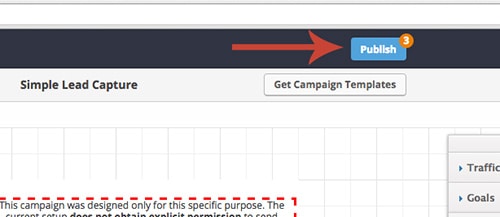
Step 7: At this point, you are now ready to publish your Infusionsoft campaign.
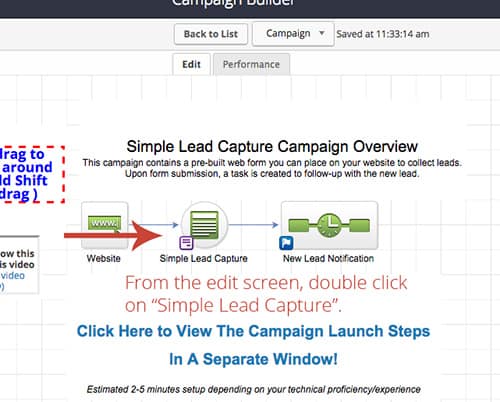
Step #8: The last thing you’ll want to do is grab the code to install on your website. To do this, click on the campaign again to get the following menu and click on the Simple Lead Capture icon.
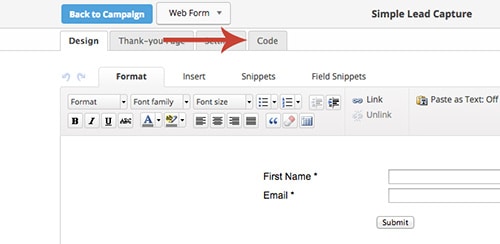
You’ll see the simple form that will be placed on your website.
The last tab is called Code, click on that.
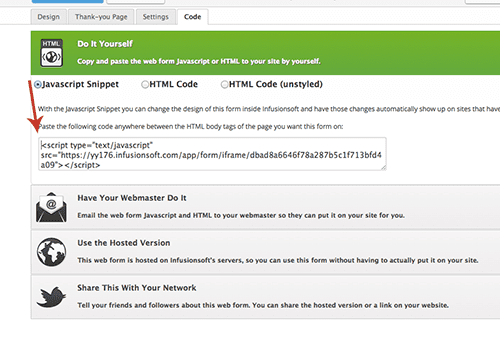
Copy the Javascript Snippet and place that on your website.
And that’s it!
You are all ready to start capturing leads and give away that ebook or whatever else it is you have promised your followers.